

How Do You Clean A Carburetor On A Lawn Mower?
At the start of the new mowing season, many people suddenly discover their Backyard mower that was working perfectly at the end of last year now doesn't desire to starting time. There could be several reasons for this, including former fuel, a dirty spark plug or many others. Nevertheless, one of the almost common causes for a mower to terminate running properly is that it has a corroded or blocked carburetor.
Carburetors are not then hard to set, just many people don't experience confident taking an engine apart, preferring to take it to a repair shop – fifty-fifty though a dirty carburetor is something most people will be able to ready themselves.
If you want to save yourself some cash when your mower won't offset, here'due south how to make clean a Backyard mower carburetor at home.
If you want a preview, here's a video that shows many of the steps we'll be talking about.
Step-by-step guide to cleaning backyard mower carburetor
Hither's our footstep-by-step guide to cleaning a Lawn mower carburetor. If the carburetor is the problem, follow these steps to clean information technology yourself without needing to call in a professional person.
Of course, this just applies to gas mowers and non to others like cordless electric Lawn mowers or bombardment-powered cocky-propelled Lawn mower south .
An important tip – if this is your first time cleaning a carburetor or y'all are non sure about how to put it dorsum together, take photos with your prison cell telephone at each step when you remove something. This way, you will take a guide when information technology comes to putting information technology back together.
Pace ane. Safety first
Whenever carrying out repair work of any kind, safety should always be your main business concern. Since sometime fuel can be highly noxious, when taking autonomously a carburetor, the almost of import thing is to make certain y'all are working in a well-ventilated area.
If y'all are working in a garage, open the door and whatever windows. If possible, also utilise a ventilation fan. If your garage or workshop doesn't have windows or doors you tin open, you should consider working somewhere else.
Step ii. Cheque to see if the problem really is the carburetor
Sometimes when diagnosing a problem with mechanism, some people can be too quick to jump to conclusions. For instance, in that location might be a temptation to aspect the mistake to a bad carburetor when actually the problem is something much simpler.
For this reason, earlier you first dismantling your Lawn mower, the first affair is to cheque a few other possibilities first.
Does your Lawn mower have fuel in it? Ok, and then this might sound extremely obvious, but many people even so forget to look.
If the mower has fuel in it, check the ignition switch is in the correct position and also make certain the spark plug is attached properly and isn't dirty.
Finally, take a expect to see if the air filter is clean and free of debris.
If all of these are in order, shoot some carburetor cleaner into the carburetor and try starting the mower. If it starts or even splutters after you lot do this, information technology's a good indication you actually do have a carburetor problem and you lot need to remove it and give it a clean.
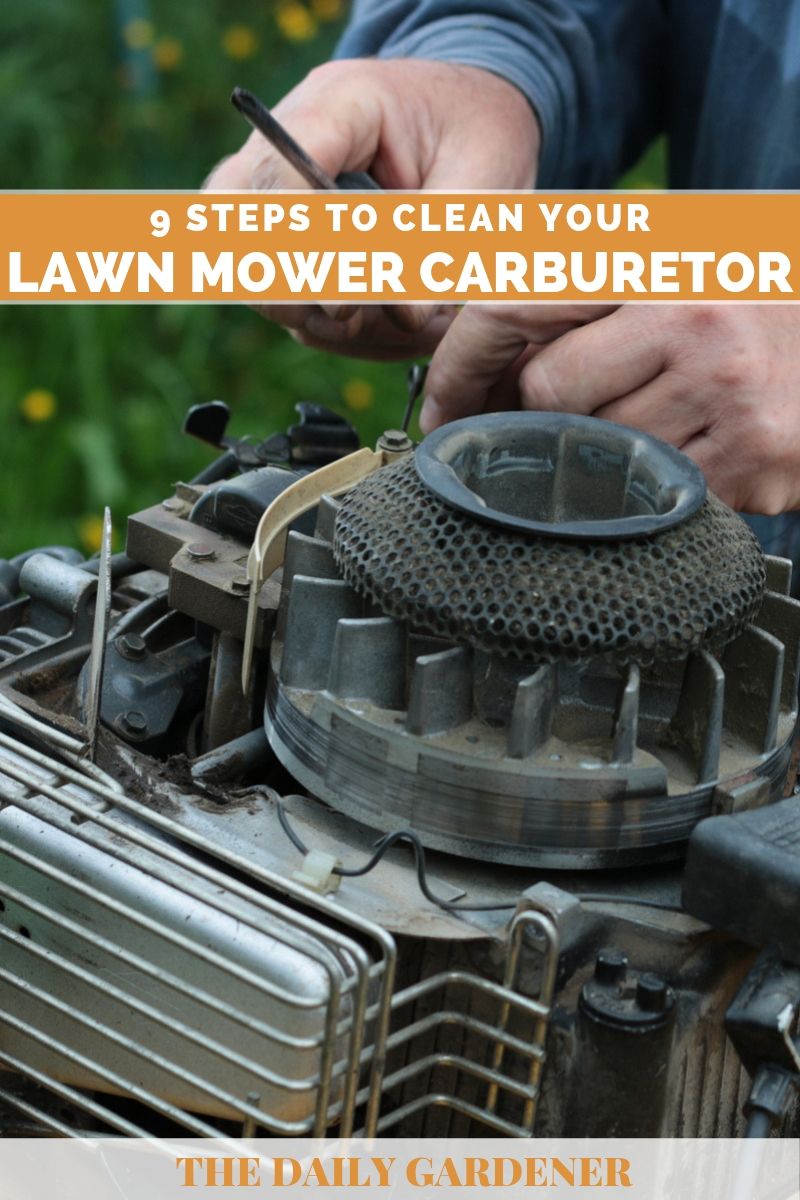
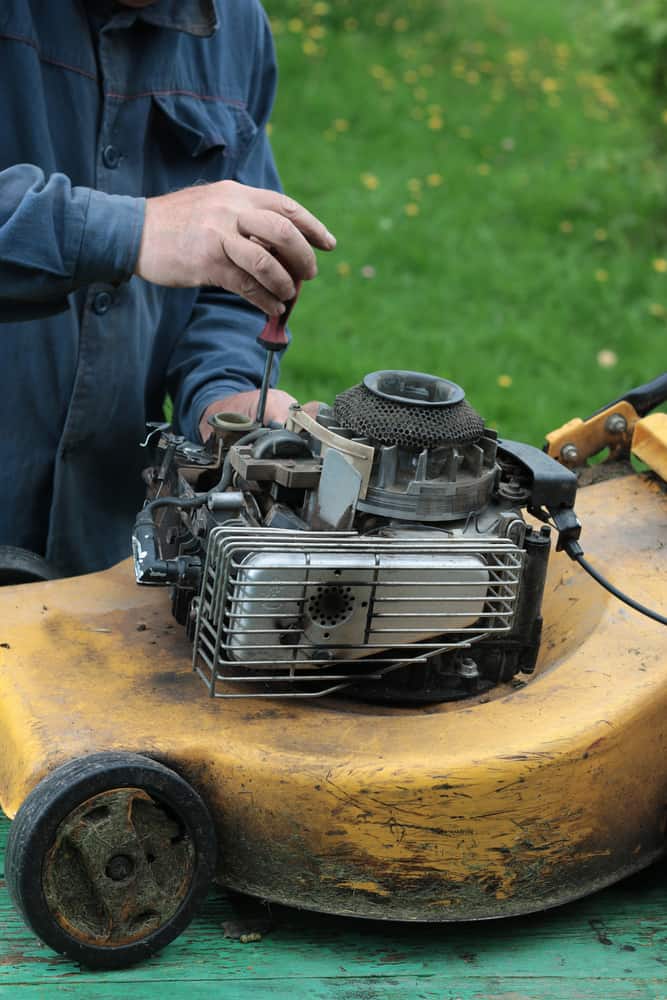
Step 3. Remove the outer casing and air filter
How to practise this depends largely on your model of Lawn mower, simply in general, it should simply be a instance of unscrewing a few screws and removing the outer paneling to reveal the Lawn mower'south innards. Remove the air filter and you lot volition find the carburetor.
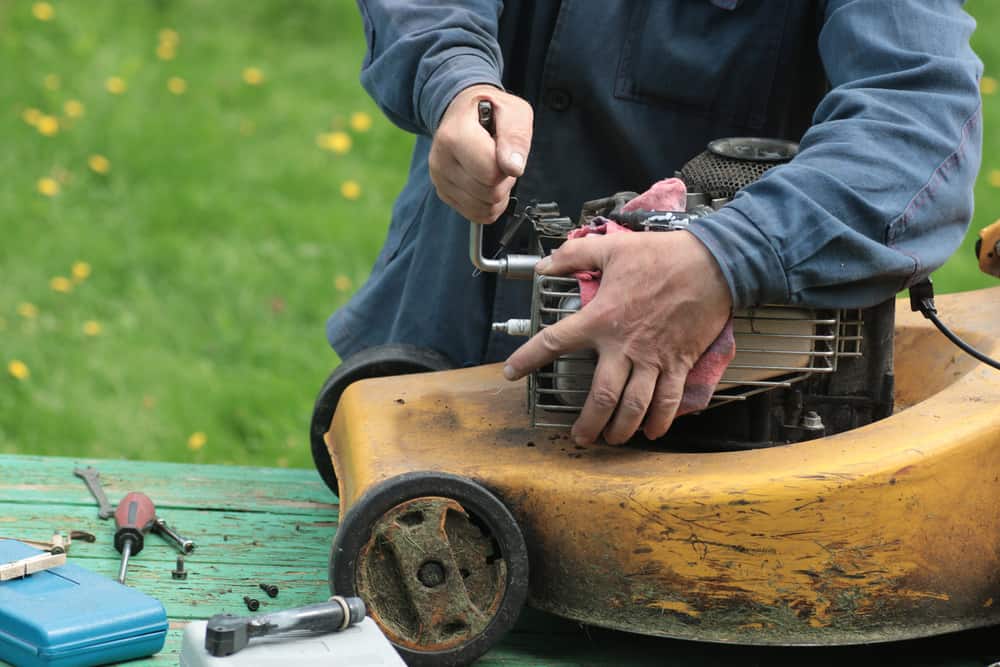
Step 4. Unbolt the carburetor and remove it from the fuel line
The carburetor itself should be bolted in place. Unbolt the carburetor and then ease out the fuel line.
At this phase, some fuel should spill out of both the carburetor and the fuel line and then information technology'southward best to be ready with a piece of rag to catch the liquid.
If no fuel spills out, it may mean y'all accept a different problem – this could be an indication that you accept a fuel line blockage, so at this point, you might desire to check that the fuel line is clear.
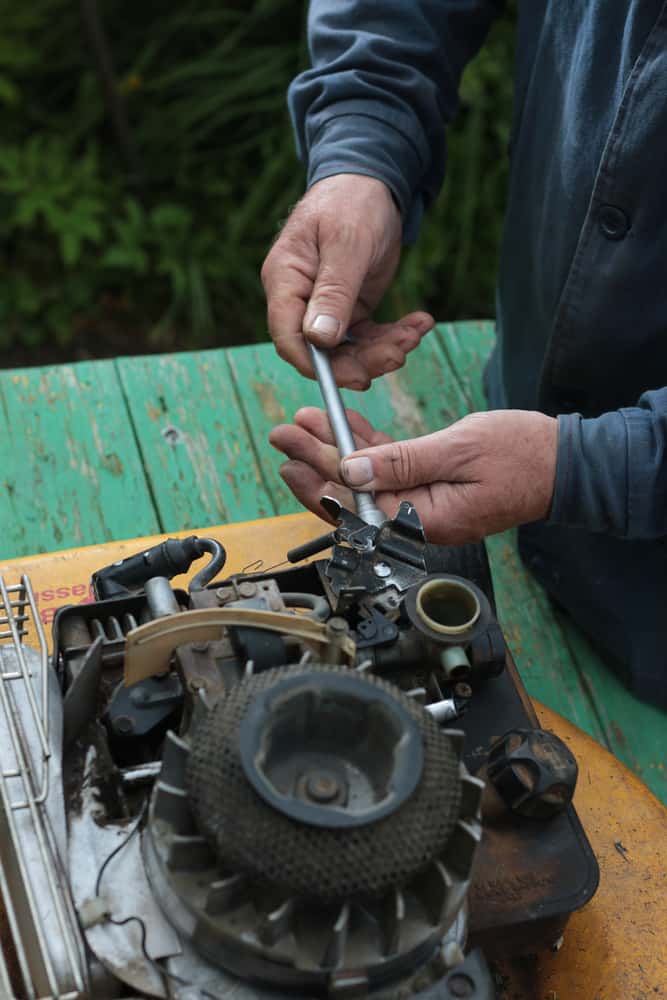
Step 5. Unbolt the bowl and make clean the nut
The carburetor bowl is held in place by a single nut. First, clean around the bowl with carburetor cleaner then unscrew the nut and remove the bowl. This nut is actually a jet with a hole, and y'all demand to make sure the hole is clear of any obstructions.
Y'all tin do this simply past poking a paper clip or piece of wire inside. Having a small piece of droppings inside the jet is i of the most mutual reasons for a carburetor to finish working, and but cleaning out the pigsty could fix your problem.
If the gasket is old, some of it may also be stuck to the nut – then requite it a clean by scraping it off. Finally, spray the nut with some carburetor cleaner. Here's a video that shows these steps clearly.
If the bowl is damaged or particularly dirty, you lot should replace it rather than try to make clean it.
Step six. Replace the needle
Once you lot remove the bowl, y'all will see the float attached to the carburetor with a pin. Remove the pin and supersede the needle.
Inside the carburetor, in that location is a small gasket where the needle sits. You should too supercede this, taking care to fit the new one the right way around.
Step 7. Spray the carburetor with cleaning fluid and clean inside the holes
Once yous have removed all the parts, you should clean the carburetor by giving it a proficient spray with carburetor cleaner.
Yous volition besides need to make clean inside the diverse holes in the carburetor. This can be done with a paperclip or slice of wire like with the nut in Step 6. Make certain that all the holes are articulate and costless of droppings.
Step 8. Replace the main gasket
When you take the carburetor autonomously, information technology's always a good thought to supervene upon the chief gasket that goes between the carburetor itself and the basin. Just remove the old one and fit a new one in its place.
Step nine. Reassemble and reattach
Using the photos you took at each step on your cell phone, put the carburetor back together and reattach it to the engine.
Once everything is back in place, add together fuel to the tank and start it upwardly. If yous have fixed the trouble, it should now start up easily.
A relatively easy issue to gear up
Even for those who aren't experienced in working with machines and engines, fixing a clogged or dirty carburetor is relatively easy and can save you money. However, if you follow all these steps and the mower nevertheless doesn't go, it might be time to remember well-nigh taking information technology to a repair shop.
Don't forget to pivot it!


Source: https://www.thedailygardener.com/clean-lawn-mower-carburetor
Posted by: hildrethcurre1963.blogspot.com
0 Response to "How Do You Clean A Carburetor On A Lawn Mower?"
Post a Comment